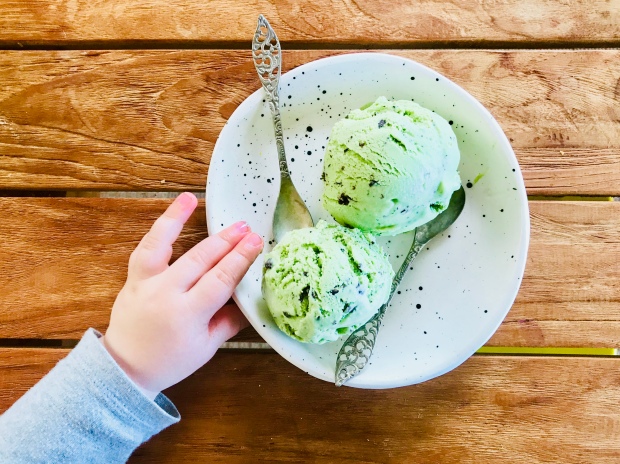
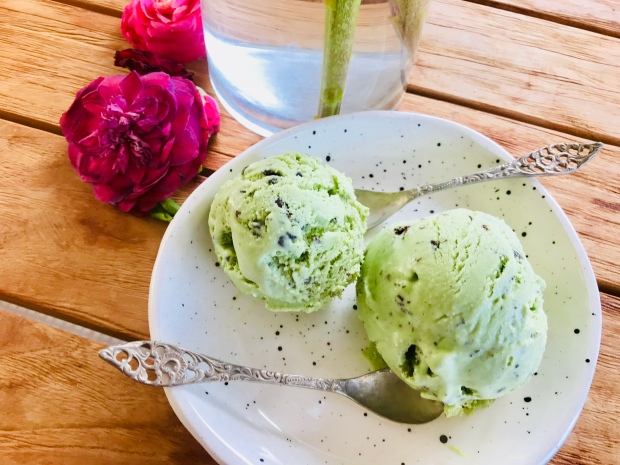
Mint Choc-Chip Ice Cream

Recently my daughter as formed a new love of picking all sorts of plants and flowers. Some days it’s all about finding pink things in the gardens on our way to and from kindy, other days it’s about finding new “I haven’t seen this before!” items.

Sometimes I inwardly roll my eyes and encourage continuing on to our destination. But in less time-pressured moments I can stop, look, and smell; chatting about different plants and flowers along the way.
The new development has inspired us to put more effort into our own gardening – which is lacklustre at best. However, we’re on a mission planting herbs, leafy greens, and what will hopefully be a bumper crop of zucchini!
We’re learning different ways to use our growing plants, and looking forward to what is to come! But what better way to use a bunch of greens than in ICE CREAM?!?!

A note about the recipe; we’ve played around A LOT with various ice cream recipes in our house. In our experience the two different sweeteners combine to give you the best creamy, rollable consistency. For the granular sugar, coconut sugar will give the lovely taste, but a sugar derived from cane (e.g rapadura or raw cane) will give a better texture – so it’s up to you and what ingredients you prefer!
I also recommend sticking with rice malt syrup instead of switching out for maple or honey, because, once again; texture 🙂
And yes, it’s definitely best made in an ice cream churner (I’m a huge fan of investing in one!!) so if you don’t have a churner maybe you’d like to give other recipes such as Passionfruit Instant Ice Cream a whirl (a serious favourite of mine)

All in all, have FUN creating your own ice cream, and enjoy the summery deliciousness!!

MINT CHOC-CHIP ICE CREAM

2 cups full-fat milk
1 cup cream
3 tbsp granular sugar (e.g coconut sugar, rapadura, muscovado, or raw cane)
2 heaped tbsp rice malt syrup
2 tbsp tapioca flour
1/2 cup full-fat milk
2 large handfuls baby spinach
3 tbsp cream cheese
pinch salt
3 drops peppermint essential oil
50g dark chocolate (use your fave, I love a dark 90%)
1/2 tbsp coconut oil

Place the first measure of milk, the cream, sugar, and rice malt syrup in a large pot.
In a bowl, mix together the tapioca flour and the second measure of milk –
set aside.
Heat the milk/cream mix over a medium heat – bringing it to the boil. Boil for a few minutes.
Carefully pour half the hot milk/cream mixture into the bowl with the tapioca/milk whilst whisking.
Then replace the pot to the heat and pour all the contents from the bowl back into the pot. Whisk while it thickens to a good custard consistency.
Remove from the heat.
Place the spinach leaves in a high speed blender. Pour 1/2 cup of the hot ice cream base over top. Blitz on high until the spinach is well incorporated and the mixture is smooth.
Put the cream cheese and salt in a large glass bowl. Pour roughly a cup of the hot base mixture over top. Whisk until the cream cheese is well mixed through and the mixture is smooth. Pour the remaining hot base into the bowl, as well as the spinach blend. Using a spatula; mix it all together until you have a beautiful light green concoction. Set aside to cool a little then place in the fridge (or an ice bath if you want to speed up the process) until it is cold.

When ready to churn; place your chosen ice cream container in the freezer to cool (I use a 1.5L glass clip-lid container).
Pour the cooled mixture into your ice cream churner and churn as per manufacturer instructions. Whilst its churning, place the dark chocolate and coconut oil in a small saucepan. Heat over a medium heat while stirring with a spatula until it is melted and smooth. Set aside.
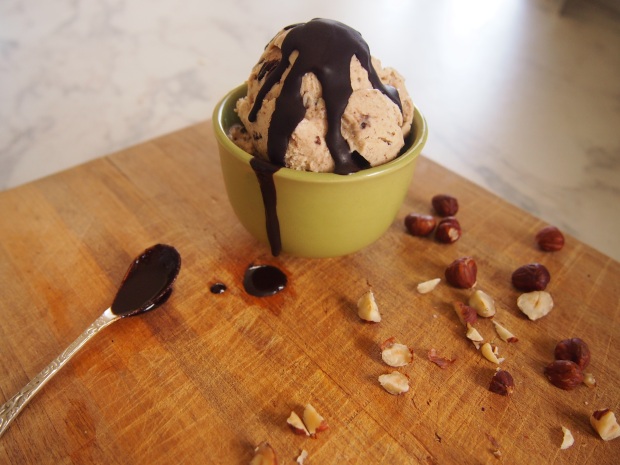
When the ice cream is almost ready (getting to soft-serve consistency) – slowly drizzle the melted chocolate in through the top as the ice cream continues to churn. It will break up into little chocolate chips and mix through 🙂

Once finished churning, spoon the mixture out into your chilled container and return it to the freezer until you’re ready to eat (initially it will be a softer consistency but will harden the longer it’s in the freezer – if using the next day or beyond then allow ‘softening’ time by sitting it on the bench for 20mins before scooping).

ENJOY!!!
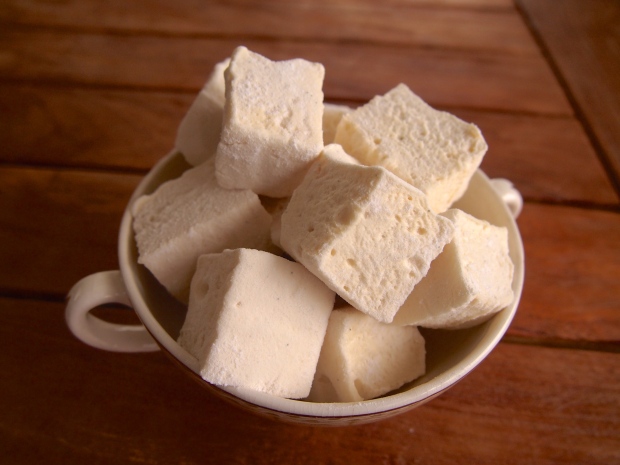
Homemade Marshmallows (Gluten, Grain, Dairy, Egg & Refined Sugar Free)

Marshmallows. So simple, yet so undeniably wonderful!!
There’s something about marshmallows that bring memories of childhood flooding back… the oozy meltiness in a hot chocolate, the slightly blackened and crispy goodness cooked over a campfire, stacks of sweet airiness stuffed into mouths – all memories of joy-filled marshmallowy moments.

A while ago I set my mind to creating a Hungry Cub recipe. Something that produced the same results of my memories, but without the refined-sugars and difficult processes.
Initially I enlisted the use of a candy thermometer in my methods. But that darn thing was just a pain. It kept falling out of the pan, and getting in the way – plus I was reluctant to use something that people might not have in their kitchens. So I went back to the beginning and simplified things.

Now the only key requirement for this recipe is using a stand mixer. I guess you could try with a handheld, but a stand mixer will have the grunt and power to ensure a true fluffing up so you have a higher quantity of gorgeous fluffy marshmallows ❤

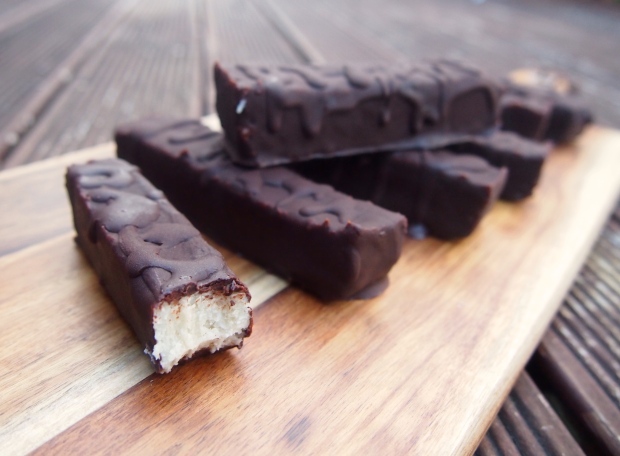
I’m so pleased with how this method turned out, and we’ve enjoyed it MANY times since! We’re using them to create rocky road slices, marshmallow chocolate bars, our own mallowpuff biscuits, rocky road ice cream, hot chocolate sides, kindy snacks, and simply straight from the container for a pop of sweet deliciousness 😀
I’d love to hear what mallow creations/moments you enjoy in your house!

Happy baking xx

Homemade Marshmallows (makes about 6-8 cups of marshmallows, depending on sizing)

1 cup cold water (divided)
3 tbsp gelatine (I use Great Lakes Gelatin)
1 tsp vanilla bean paste (or seeds of 1 vanilla pod, or 1 tsp vanilla extract)
pinch salt
1 cup honey (I use clover honey) – you can sub with brown rice syrup if you prefer and can tolerate grain products
tapioca flour – for dusting (you can substitute this with cornflour if you prefer and can tolerate grains)

Prepare a container/surface for which you will mould/cool your marshmallows. I use a couple baking trays. Line with baking paper then sprinkle a fine layer of tapioca flour over top.
Place 1/2 cup of the cold water in the bowl of  a stand mixer. Add in the vanilla and salt. Sprinkle over the gelatine and leave to sit/soften while you do the next few steps.
Pour the other 1/2 cup cold water into a medium-large saucepan along with the honey. Heat over a medium-high heat. Bring to the boil while gently mixing everything together as the honey melts. Then allow to boil without mixing for 8 minutes. It will bubble up a bit (hence why you should select a medium-large sized pot) – that’s ok.
Once the honey mixture has been boiling for  8 minutes, remove from the heat. Turn the mixer (with the softening gelatine) on at a low speed, slowly pour the hot honey mixture in a stream, allowing to to mix into the gelatine, combining well. Turn the mixer up to high speed. Beat for approximately 8 minutes, until the mixture is white, fluffy, and quadrupled (or so) in size.
Working quickly using a rubber spatula, turn the mixture out onto your prepared trays. Spread out to your desired thickness. Quickly sprinkle with a dusting of tapioca flour then gently press another sheet of baking paper over top (the second layer of baking paper is not absolutely necessary but will ensure even shapes of your marshmallows.)

Set aside to cool on the bench. Once fully cooled (at least 2 hours). Cut into your desired shapes/sizes. Sprinkle the marshmallows again with a dusting of tapioca flour and toss around so the cut edges don’t stick together. Store in an airtight container. Are best stored at room temperature however excess marshmallows can store easily in the freezer (it may cause them to shrink only slightly when taken out of the freezer, but this is minor – I store most of mine in the freezer for morning hot chocolates 🙂 )

Enjoy your marshmallow goodness!!

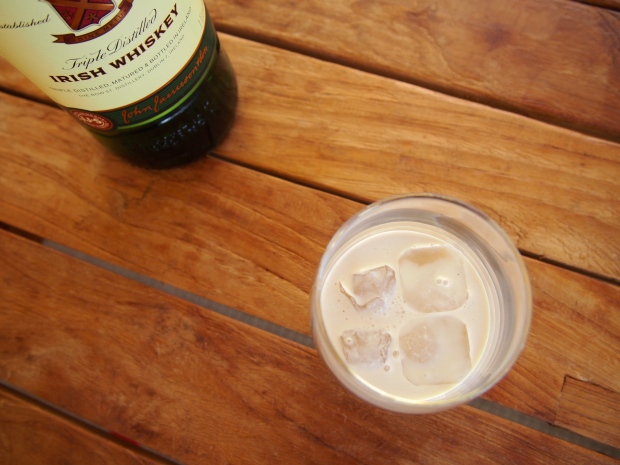
Hungry Cub Irish Cream Liquor (Dairy-free option, Refined Sugar-free)

Baileys has long been my favourite liquor, and seems to be a huge hit in the world out there. It’s smooth and scrumptious on its own, with ice, over ice cream, or incorporated into some phenomenal dessert. A winner in every way.

I recently discovered that it’s actually a pretty simple to whip up a homemade version . Why I didn’t find this out when I was in my “strictly dairy-free” phase, I do not know. But I know it now so I will not complain 🙂
As soon as I learned that Irish Whiskey was in fact the base of said favourite liquor, I went about designing a refined sugar free version to whip up at home (with a dairy-free counterpart for those of you who like/need to avoid dairy).

Check out the recipe. It truly is simple.

Now, because I don’t use sweetened condensed milk or eggs, this Irish Cream is a bit “thinner” than the bottle-store-bought counterpart, but it still packs that luscious punch and can be served whichever way you like it.

For a bit more luxurious creaminess, I add a couple scoops of my homemade vanilla bean ice cream (either dairy, or dairy-free depending on the mood or availability!)
It’s optional. Don’t add any, or add your favourite.  Ooooor hit me up and I just might be able to write up the recipe for my own concoction ❤

Hungry Cub Irish Cream Liquor (makes 1&1/2 cups)

1/2 cup cream/coconut cream
1/2 cup Irish Whiskey (I used Jameson)
2 tbsp strongly brewed coffee
2 tbsp pure maple syrup
1/4 tsp vanilla extract

2 scoops homemade ice cream (vanilla bean or chocolate) – optional (use coconut milk ice cream if requiring dairy-free)

Place the cream/coconut cream, whiskey, coffee, maple syrup and vanilla in a blender or shaker. Beat together until well combined. If using ice cream, add and beat again to mix through. Pour into a glass bottle. Serve or refrigerate until required.

Is delicious served over ice or a scoop of your favourite vanilla ice cream/”nice cream”.

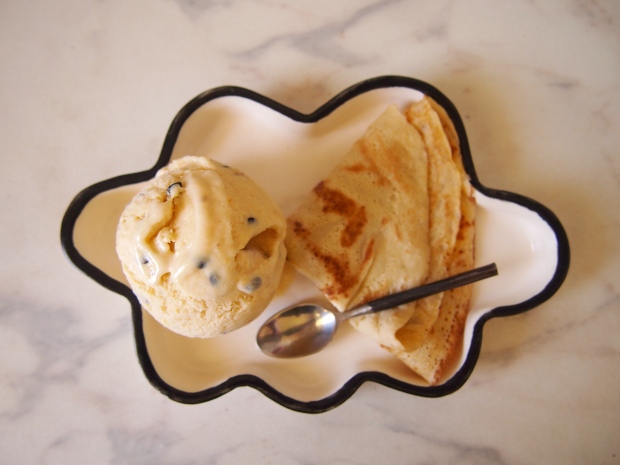
Passionfruit Instant Ice Cream (Refined Sugar Free – Fruit Sweetened)

Ice cream. I never tire of it. I don’t think I ever will. Ice cream is a lifetime companion.

I’ve been making and eating various flavours of ice cream ALL. SUMMER. LONG. And now that Autumn is here… there’s no sign of stopping.
For quite some time I was restricted to eating dairy-free (breastfeeding reasons) but now our little dude is coping well with the goodness, and I have to be honest; I’m LOVING having dairy back in my life. Consider this recipe a celebration of that fact 🙂
(So – sorry for those of you who are dairy-free right now, because this recipe isn’t, but check out the rest of the blog for options to suit your needs!)

Several times I’d spied frozen passionfruit at my supermarkets, usually as I reached past to grab berries (for berry ice cream of course – what else?!). Recently I decided to try something a little different. And BOY was I pleased!
This GLORIOUS ice cream combo has to be high among my list of favourites. It’s creamy, tangy, naturally sweet, and sooooo moorish.

So get to it, it’s a goodie ❤

NOTE: This recipe is one to be played with. If you don’t have the exact quantities – don’t stress. Add a little more, or a little less of whatever you like. Instant ice cream is quite forgiving! When you’ve tried this method feel free to switch it up a bit – add some frozen mango to the mix, or berries instead of passionfruit… whatever you like (personally I’m hanging out for that coming season of feijoas, but I’m sure I’ll be making this variety for quite some time!)…

Passionfruit Instant Ice Cream (makes approx 1.3L)

4 bananas, sliced and frozen
250g frozen passionfruit pulp (if using from fresh; freeze them in an ice cube tray. If buying; you can find packs of frozen cubes in the frozen fruit section of your supermarket)
3 tbsp full-fat cream cheese
3 tbsp thick unsweetened greek yoghurt
1/2 cup cream
1/2 tsp vanilla extract
tiny pinch salt

if you prefer it sweeter try adding 1/2 tbsp honey, but I think it’s perfect as is 🙂

Place the frozen bananas and passionfruit pulp cubes in your food processor. Blitz until crumbly.
In a bowl, mix together the cream cheese, yoghurt, cream, vanilla, and salt.
Pour this into the food processor.
Blitz on high until it comes together to a smooth, soft-serve like consistency mix.
Eat straight away, OR immediately spoon into a freezer container and freeze to your desired consistency.
It retains the creaminess superbly so will keep well in the freezer for many days. Just remove to sit on the bench for 5-10mins to soften a little before serving.

ENJOY!

Orange, Carrot & Poppyseed Cake (Grain-free, Nut-free, Refined Sugar-free, and Dairy-free option)

You’re ONE!!!
One whole year has passed of family life with you in it. And heck, you are the coolest little dude we know.
You point excitedly, wave generously, yell randomly, smile wildly, giggle at your sister, huff at the cat, & explode with a “DA!” when you see your Dad.
Your birthday also feels like a graduation from the ‘parents of a baby’ stage. It’s a new era! You may still be ‘waking in the night’, but who gives a rip when that means a cozy snuggle with you?! Sleeping is overrated.
So happy birthday Little Badger. Bring on the moments yet to come.
We’re ALWAYS grateful to God that you’re our wee man ❤ 

This cake I improvised the day before the little dude’s party. And thankfully it was a grand success! I’ve rebaked it since and it’s always worked a treat 🙂 It’s grain-free, nut-free (perfect to pop in the kindy snack box for our older girl), and easy to make dairy-free if that’s what you need.

Note: I doubled the recipe and made two layers for his party  (plenty to feed a big crowd!) and iced with a cream cheese centre and dark chocolate ganache topping. If you require a dairy-free alternative to cream cheese try this one here 🙂

Enjoy xx

Orange, Carrot & Poppyseed Cake (makes 1 layer of 22cm cake)

2 oranges
2 large carrots (approx 200-250g)
3 tbsp coconut sugar
1 tbsp honey
2 tbsp butter or coconut oil
4 eggs
4 tbsp coconut flour
1 tsp cinnamon
1/4 tsp salt
1&1/2 tbsp poppy seeds
1 tsp baking soda

Place the oranges (whole) in a pot and cover with water. Bring to the boil then simmer for 45mins until very soft. Drain off the water and set aside.
Preheat oven to 160’C. Grease a 22cm round cake pan (or whichever pan you decided to use) and line the base with baking paper.
Peel and roughly chop the carrots (in big chunks)  into your food processor. Process until the carrots are finely chopped.
Add the boiled oranges to your food processor and process until they’re well broken down.
Add the coconut sugar, honey, butter or coconut oil, eggs, coconut flour, cinnamon, and salt. Blend until it is well combined (you may need to scrape down the sides with a spatula and blend again).
Tip in the poppy seeds and baking soda. Give a quick blitz to disperse well throughout the mixture.
Spoon into your prepared pan.
Bake for 40-50mins or until golden brown and slightly springy to the touch.
Cool in the tin for 10mins before turning out onto a wire rack.

Cream Cheese Icing:
200g full-fat cream cheese
1 tbsp pure maple syrup
1 tsp fresh lemon juice
Whisk all ingredients together in a stand mixer until smooth. Spread over the cake.
Check for a dairy-free option here

Dark Chocolate Ganache:
4 tbsp cream or full-fat coconut milk
100g dark chocolate (either 72% Whittakers Dark Ghana or 90% Lindt are great here depending on your preference)
Heat the cream or coconut milk in a small saucepan until steaming (but not boiling). Remove from the heat and immediately add the chopped chocolate. Sit for a couple minutes to heat then gently whisk together until you have a smooth glossy mixture. Spread over the cake.
Top with a little extra grated chocolate for a soil-type look

Spiced Plum Chutney (Refined Sugar Free)

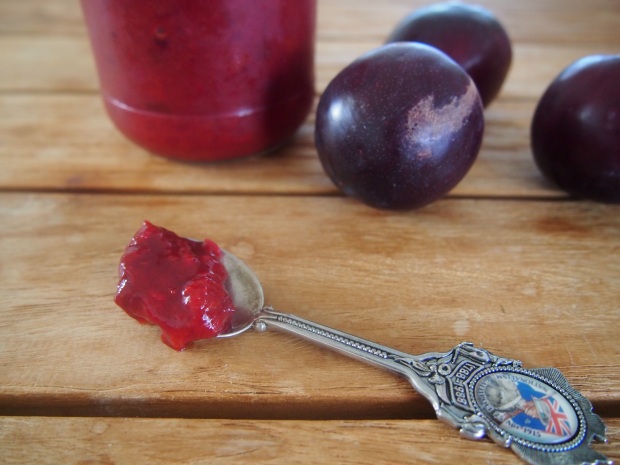
Recently we spent several nights with my brother and his wonderful family at their place in sunny Marlborough. While there, I was inspired greatly by my green-fingered sister-in-law .  One of the plentiful items from the garden was plums. Delicious, big red juicy plums!

I came home from our time away with a heavy bag of ripe plums, and the desire to get stuck into my own back yard; turning it into something productive and beautiful. So far I’ve dug a big hole in the backyard. And I’ve lined the bench with seeds to sow. Lets see how it goes from here…

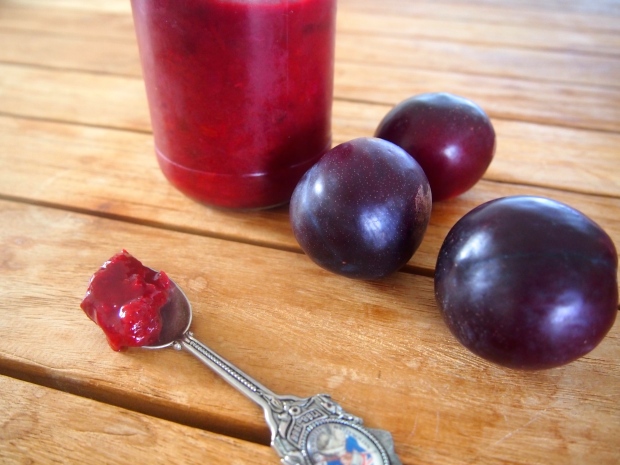
I whipped up a quick plum chutney with a portion of the plums we had. It’s naturally sweet yet deliciously tart. Perfect for sweet or savoury options and for us has been a topper for crackers, addition to yoghurt, sauce for pizza, and side for meats.
Check out the recipe and try it for yourself…

Spiced Plum Chutney

1 tbsp coconut oil or butter
1 red onion, diced
1 kg plum flesh, de-stoned and roughly chopped.
2 tsp freshly grated ginger
1 tsp cinnamon
1/4 tsp all spice
pinch cloves
1 bay leaf
1 tbsp orange zest
juice of 1 orange
2 tbsp apple cider vinegar
honey to taste – optional (I don’t use any as I love the tart flavour)

Heat a pan over a medium heat. Melt the oil, and add the onion. Stir and allow to soften for 5 mins. Add the remaining ingredients. Bring to a simmer, turn the heat to low and simmer for 30mins until it has thickened to your desired consistency.
Set aside to cool then spoon into jars. Store in the fridge. Will keep for 2 weeks but it freezes well too 🙂

Chocolate Shell Sauce (Gluten, Dairy & Refined Sugar Free)

Was anyone else delighted by that chocolate magic shell sauce as a child?! That amazing stuff that went hard when you poured it all over your ice cream – it actually seemed rather magic!
I have such fond memories of the little brown bottles. The anticipation while warming it in the microwave. The fascination while watching it harden upon the cold ice cream.

A while ago I decided to make my own Hungry Cub version; one that is made up of real ingredients, and a simple process to put together.

After a couple of attempts, I hit the jackpot 😀 We watched in owe as the smooth sauce formed a hardened shell over my cold dessert 🙂 We delighted in the crack as we broke through to the soft ice cream beneath!

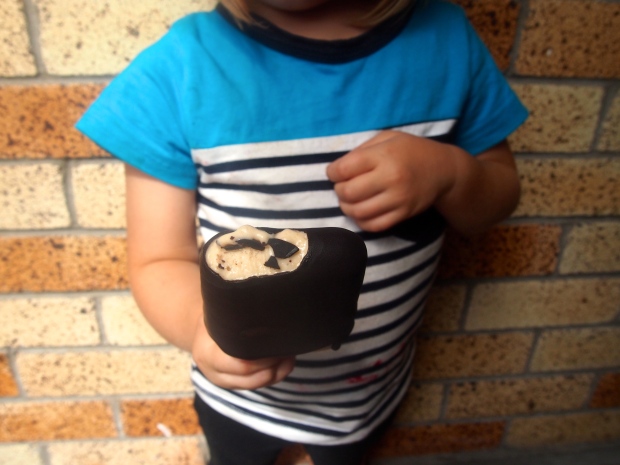
I now use this recipe a LOT. Mostly because I eat ice cream a LOT. But it’s my go-to concoction for chocolate bar coverings and ice block coatings. It’s a firm favourite! Basically, the recipe is going to have a loooooong life in our kitchen!
So let the magic ensue…


Chocolate Shell Sauce – serves 2-4

2 tbsp coconut oil
2 tbsp cocoa
1-2 tbsp pure maple syrup
pinch salt
1/2 tsp vanilla extract – optional

Place the coconut oil in a small saucepan and heat over a medium heat (while gently whisking) until it is all melted.
Remove from the heat, add the cocoa, pure maple syrup, salt, and vanilla extract (if using). Mix gently until well combined. Allow to cool slightly.
Serve over your favourite ice cream (or try instant banana ice cream or this one here 🙂 )

This is a small batch I often make when it’s just the two of us, but if I know we’ll be enjoying ice cream several nights in a row, or if I’m planning on coating ice blocks I often double the recipe and store the extra in the fridge.

Note: With leftover, I recommend storing in a small bowl/jar in the refrigerator. It will hardened but you can warm it (bring it back to liquid consistency) by placing the bowl or jar within a larger bowl of hot recently-boiled water.

Enjoy!!
Hungry Cub Loaf (Gluten, Grain, & Nut Free. LCHF Bread)

Oh summer holidays, how I love them!
We recently returned from several weeks holiday in South Africa. It was one of my most favourite holidays yet. Family reunions, wedding celebrations, beautiful settings, glorious sunshine, fun adventures, scrumptious food, and so much good quality time with people we love yet don’t see often enough. It was a holiday we didn’t want to end – too hard to say goodbye, too sad to draw a close to the wonderful times.

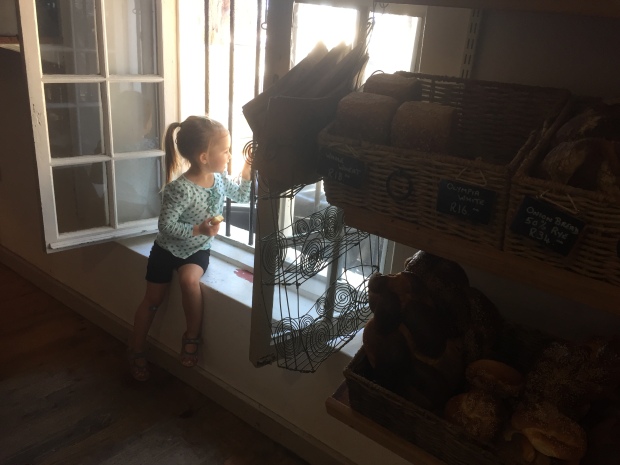
We stayed in five different places during our time away. In our final spot we slipped into an unofficial routine of wandering down to the local bakery for takeaway coffees and breakfast. The boiled eggs and sausages were my favourite! Each morning, looking over the shelves, I kept eyeing the loaves of ‘Banting Bread’, my interest piqued by the list of ingredients but then I’d veer back to purchase eggs. Towards the end of our time there I grabbed a loaf to sample. It was delicious! And our Little Miss also tucked in heartily. So I tasked myself with recreating a Hungry Cub version when I returned home.

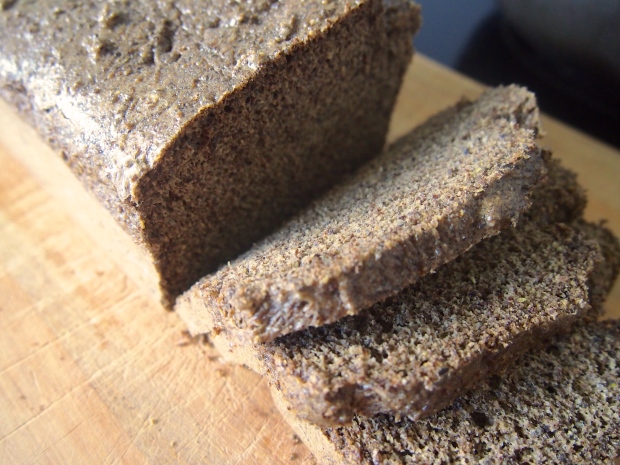
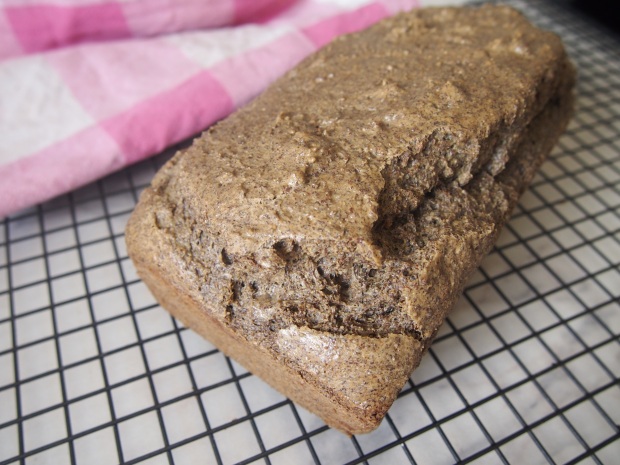
On my first attempt I thought I’d created a complete failure, muttering angrily to myself about ‘wasting ingredients’ as I slid the pan into the oven. Thirty five minutes later I pulled out a beautiful loaf, humbly surprised that it actually worked! It  was even softer/more sandwich-friendly than the original, and it tasted great too!!

After a little tweaking I give you the recipe for my Hungry Cub Loaf. An ode to a great holiday…

img_3438

Hungry Cub Loaf (makes 1 loaf)

2 cups flaxseeds/linseeds
1 tsp baking soda
6 eggs
1/2 cup water
4 tbsp coconut oil or butter, softened
1 tsp salt
1 tsp poppy seeds (to cover) – optional

Grease a loaf pan (I use 25cmx15cm) with butter or coconut oil and line across the long sides with baking paper. Preheat oven to 180’C/350’F.

Place the flaxseeds in a high-speed blender. Blitz until it becomes fine/flour-like in consistency. Add the baking soda and pulse lightly to mix through. Add the remaining ingredients except the poppy seeds. Blend on high speed to combine together well.

Pour/spoon the mixture out into the prepared loaf pan. It will be quite thick in consistency. If using the poppy seeds, sprinkle over the mixture.

Place the pan in the oven. Bake for 35-40mins or until a skewer comes back clean when you poke it through.

Cool on a wire rack. Then slice and enjoy! Store in an airtight container when not eating. Best if eaten within 5 days.

Creme Anglaise/Custard (Grain & Refined Sugar Free. Dairy-Free option)

Creme Anglais

As I sit here, we’re only a couple days out from boarding a big plane, and heading overseas for family reunion Christmas.

Our resident four-year-old has been looking forward to the plane trip with greeeeeat excitement (let’s hope that lasts for the 24 hour trip!), our little nine-month-old spent the entire last night screaming thanks to newly arriving teeth (great timing). So we look ahead to the journey with slight apprehension, yet, we can’t wait!

We can’t wait for all the hugs of greeting. We can’t wait to soak up the sun with family we hardly ever see. We can’t wait to gather with the nieces, nephews, cousins we’ve never meet in person. We can’t wait to watch our children forge friendships and create games together. And we can’t wait to sit around big tables, eating delicious food in the company of those we love.

I’m looking forward to creating some Christmassy food, and as I (pretty much always) do, I begin to plan towards dessert first…

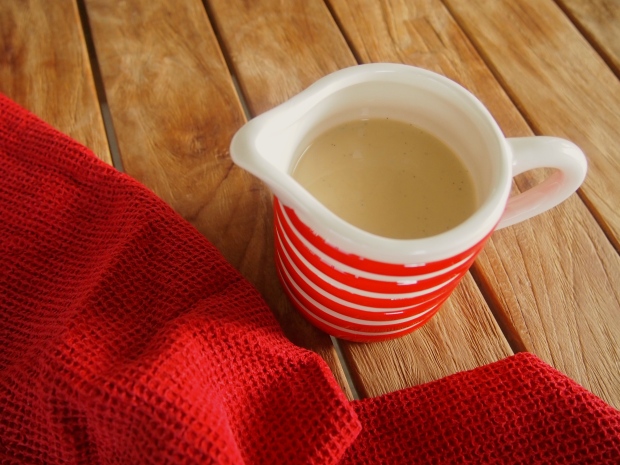
This beautiful, vanilla-speckled, silky custard is a perfect topper many a dessert dish, from fruit salad to chocolate mud cake, to a warm crumble (and secretly I highly rate it spooned straight from the jug 😀 )
Dairy or dairy-free, it’s simply delicious! And is a bit of a crowd pleaser, so definitely worth whipping up and keeping a jug handy in the fridge.

Perhaps I’ll have the chance to make it on our travels, perhaps not. Either way we can’t wait!

May you have a  Merry Christmas ❤

Creme Anglais

Creme Anglais/Custard (makes 2&1/4 cups)

1 cup full-fat milk (or full-fat coconut milk)
1 cup pouring cream (or full-fat coconut milk)
4 egg yolks
2 tbsp coconut sugar
pinch salt
seeds of 1 vanilla pod (or 1 tsp vanilla extract)
1/2 tbsp tapicoa flour + 2 tbsp full-fat milk – optional (if you prefer a thicker custard)

Pour the milk and cream into a medium sized pot. Heat over a medium-low heat until steaming (don’t bring it to the boil).
While it’s heating whisk together the egg yolks, coconut sugar, and salt in a bowl until well combined.
Once the milk mixture is steamy and hot, pour half of it over the egg yolks whilst simultaneously whisking to ensure a smooth mixture. Then pour this back into the pot with the remainder of the milk/cream. And stir well to combine. Return to the heat (medium-low) and stir constantly as it warms through. Heat until it thickens enough to coat the back of a wooden spoon.
If you wish to thicken further, whisk the tapioca flour and milk together in a small bowl until smooth. Pour this into the crème anglaise while it remains on the heat and stir gently for 5-8 mins or so until it had thickened.
Remove from the heat.
Add the vanilla and mix through well. Pour into your chosen jar, allow to cool, store in the refrigerator.

Raspberry Chocolate Macaroons (Gluten, Grain, Dairy, Nut & Refined Sugar Free)

OLYMPUS DIGITAL CAMERA

Macaroons are a regular bake in our house. Primarily because they’re nut-free, thus kindy-friendly. But in all honesty, it’s also because we make ice cream aaaaaaaall the time. And macaroons are a wonderfully scrumptious way to use the egg whites left over after whipping up an ice cream base 😀

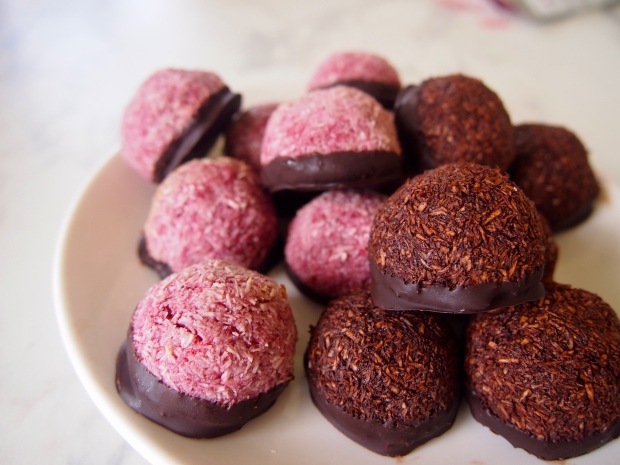
Mint-Chocolate Macaroons are among my personal favourite Hungry Cub recipes. Recently I thought to try some more flavours. Enter freeze-dried raspberry powder!!
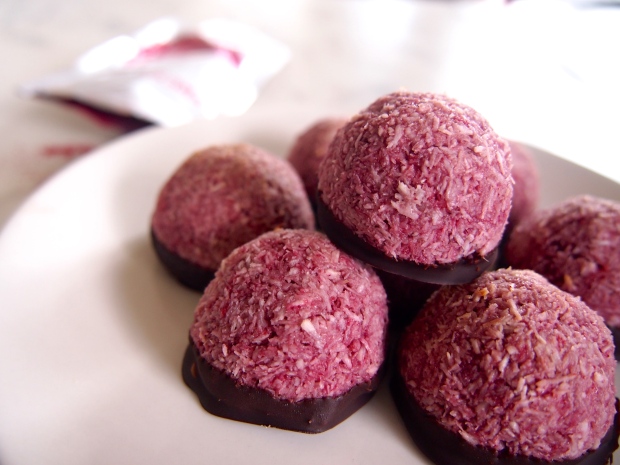
These Raspberry Chocolate Macaroons are gorgeous in colour, tasty in flavour, and a wonderful delight to pull out for any occasion, in fact my husband and daughter have decided they like them even better than the Mint-Choc variation!

Freeze-dried powders make it a super easy recipe to whip up. You can also try this with a variety of fruit flavours – it will substitute easily any of your favourite freeze-dried favourites!

By the way – Check out my Facebook page for a chance to win a little Macaroon kick-starter pack of Fresh As powder and Lindt 90% !!!!
Good luck and enjoy! ❤

OLYMPUS DIGITAL CAMERA

OLYMPUS DIGITAL CAMERA

Raspberry Chocolate Macaroons (makes approx 20)

Macaroons 
4 cups finely desiccated coconut
3 heaped tbsp freeze-dried raspberry powder
2 tbsp honey
1 tsp vanilla extract
4 egg whites
pinch salt

To coat:
50g dark chocolate (90% cocoa solids is fantastic here)
1 tsp coconut oil

Preheat your oven to 150’C and line a tray with baking paper.
In a large bowl, mix together the coconut and raspberry powder until well combined. Set aside.
Melt the honey in a small saucepan. Add the vanilla extract then pour this over the coconut/raspberry mix. Stir through well until fully mixed.
Beat the egg whites and salt in a stand mixer until you have soft white peaks.
Spoon half of the beaten egg white into the bowl of coconut mixture. Fold through. Tip in the remaining half and fold through gently until it is well combined and the mixture holds together well.
Take a tbsp of mixture, mould firmly into a golf-ball sized ball then flatten one side. Place on the tray. Repeat with the remaining mixture until you have used it all.
Bake in the oven for 10-12mins until the edges are juuust turning in colour (be careful not to overcook as they will go brown). Turn off the oven and open the door a bit. Let the macaroons sit for a further 10 mins.
Remove from the oven and set aside to cool.
Then place the tray in the freezer while you prepare the coconut base.
Break up the chocolate and place it in a small saucepan along with the coconut oil. Melt over a medium-low heat until it is smooth and glossy. Remove from the heat.
Take your macaroons from the freezer, one by one dip the bases in the chocolate and return them to the tray.
Once you have coated them all, place them back in the freezer to set fully. Store the completed macaroons in the fridge or freezer.

Enjoy!